Sticky Kickin' Chicken

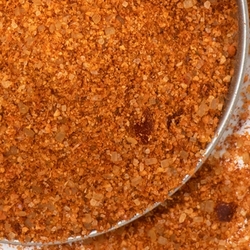
Sticky Chicken seems to be one of those recipes that transcends cuisine: Sometimes associated with sweet and spicy Asian flavors, it’s a dish that’s been wholly adopted in American South as well. Our Sticky Kickin’ Chicken draws a little inspiration from both, but incorporates our own spice blend we can’t get enough of, Kickin’ Chicken Rub.
The backbone of this recipe really is its glaze, without which our chicken would just be… chicken. The glaze has a lot of sweetness from honey and brown sugar, but it avoids becoming too cloying with some body from the balsamic vinegar. Balsamic is a better vinegar to use for this particular application because of the savory and balanced flavor it has, and a more subtle acidity than standard white or apple cider vinegars. We also used a low sodium soy sauce to add more depth, as well as a salty element. And garlic, because… it’s garlic. Kickin’ Chicken adds just a small amount of heat with some red pepper flakes, but also helps round out our glaze with some fresh notes of onion and celery seed powder.
Using a food processor to build and blitz your glaze ensures that you get a smooth, even consistency that does not separate evenly and helps your garlic to be pureed small enough that you don’t risk charring or burning any large pieces. After you’re happy with the consistency of your sauce, pour it into a pan or sauce pot and bring to a simmer. Heating the glaze will help reduce the sugar down and make the glaze a more syrup-y thickness that will coat our chicken and create a thick layer of flavor. Stir your glaze frequently to be sure no sugars are sticking to the bottom of the pan. Once your glaze has been simmering for no longer than five minutes, remove from the heat and allow to cool for at least 10 minutes before adding about a third of it to the chicken. Reserve another part to brush on later as we grill, and the last part to serve in a bowl on the side for dipping. I know it’s tempting to try and get away with dirtying as little dishes as possible but trust us on this one. It’s not worth the upset stomach. Remember that our chicken is not fully cooked, so we do not recommend using the same dish you are going back and forth to the grill with it to be used as a dipping sauce- avoid cross contamination by serving it with a bowl that’s been kept separate from the raw meat.
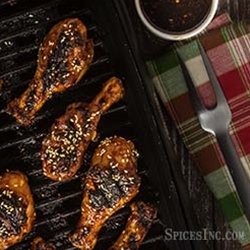
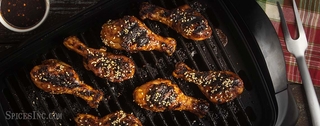
Once your grill is at a medium heat, add your chicken. Be sure the temperature is not too high so you don’t char your drumsticks, as the stickiness of this glaze means it could burn easily. If you are using an outdoor grill, we recommend oiling the grates with vegetable oil.
We’ll now brush on some of that additional glaze we set aside. Adding our sauce in stages ensures that we develop a better crust of flavor and are able to monitor how done our chicken is getting on each side. We recommend closing the lid between turns to help trap the heat and allow our chicken to cook evenly. We are using an indoor grill, but if you have a traditional outdoor grill, closing the lid also helps to impart a smoky flavor to the meat as well. Bone-in meat does cook slower than boneless, so if you’re in doubt whether your drumsticks are done, don’t be afraid to grab a thermometer and check the middle of your thickest piece.
We served our sticky chicken with some steamed broccoli, but if you wanted to really get mileage out of your glaze, feel free to brush some on any veggies you might be grilling as well.
- ½ cup Balsamic vinegar
- ½ cup Honey
- ½ cup light brown sugar
- 4 Tablespoons Low sodium soy sauce, or liquid aminos
- 6 garlic cloves
- ½ cup Kickin’ Chicken
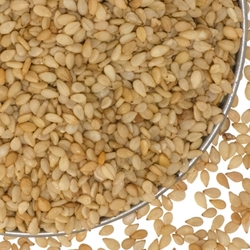
- 2 teaspoons Toasted Sesame Seeds
- 8 chicken legs
- In a mixing bowl, combine all ingredients except chicken and mix well. Place mixture in a food processor. Process until smooth.
- Pour mixture into a saucepan. Bring to a simmer and cook for 3-4 minutes. Let cool for 10 minutes.
- Pour half the cooled mixture over the chicken, and reserve half. Preheat grill to medium.
- Place chicken on grill. Grill for 7-8 minutes on first side. Glaze before turning. Turn over and glaze again. Repeat process of turning and glazing, until chicken legs read an internal temperature of 180F.
- Remove chicken from grill. Garnish with Toasted Sesame Seeds and serve with additional sauce.


